As autumn fades and winter settles in here in Finland, my casual cycling routine faces its annual interruption. For those unfamiliar with Finnish winters, it’s not so much the cold that’s the problem - although we certainly have our fair share of freezing days. The real challenge for cyclists comes in the form of snow — mounds and mounds of it, turning familiar paths into unrecognizable winter landscapes.
Now, I’m not a hardcore cyclist by any means. I ride mostly for pleasure and the health benefits, enjoying the fresh air and gentle exercise. But as the first snowflakes began to fall, I found myself pondering what I’ve come to call the Winter Cyclist’s Dilemma: How do I maintain my cycling habit when the great outdoors becomes a snowy obstacle course?
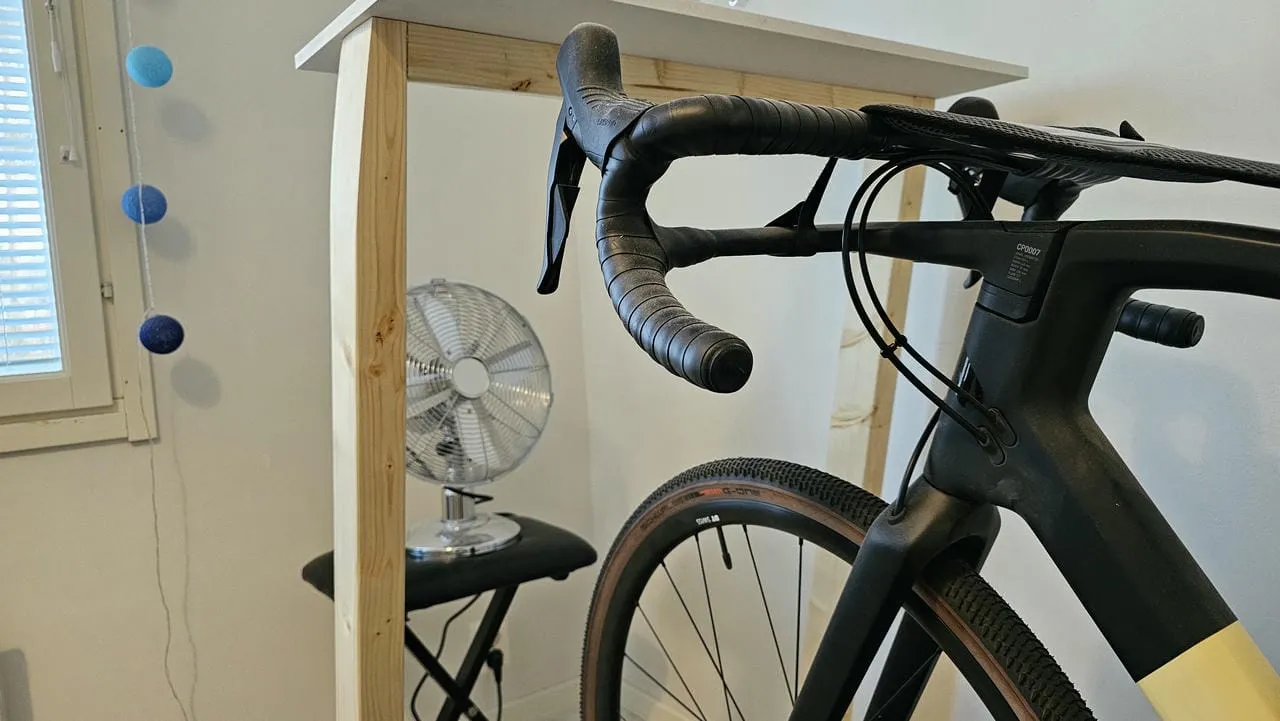
The initial solution was straightforward enough: bring the cycling indoors. I set up a bicycle stand in my home and, in true developer fashion, cobbled together a makeshift entertainment system — a shelf from my bookcase, precariously balanced on the bike stand, holding a tablet. It wasn’t pretty, but it got the job done, allowing me to watch movies or catch up on some reading while I pedaled.
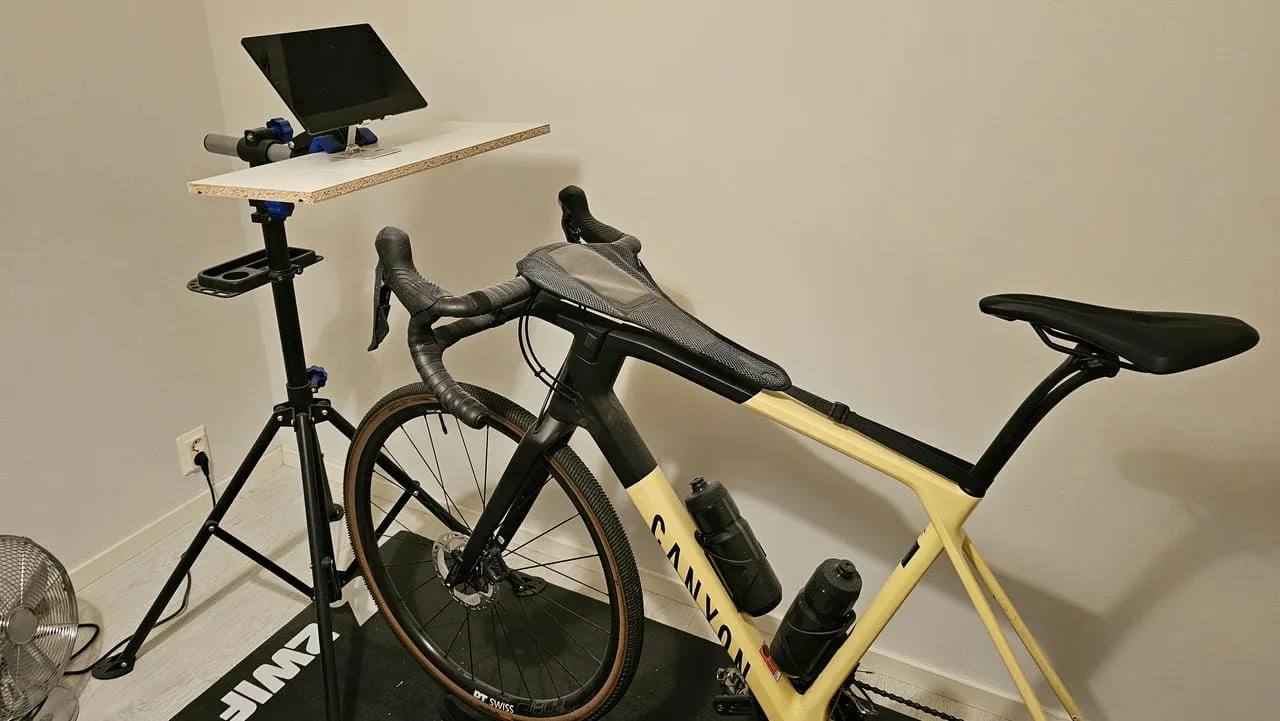
However, as I used this makeshift setup, I began to envision something better. What if I could create a purpose-built desk for my bike setup? Something sturdier and more aesthetically pleasing than my bookshelf-on-a-bike-stand contraption. Nothing too fancy — just a straightforward, solid surface to make my indoor cycling sessions more enjoyable and perhaps a bit safer for my tablet, which, by the time this idea struct, had fallen at least three times.
Now, I could have easily ordered a ready-made solution online. But they are surpisingly pricey, and honestly — where’s the fun in that? As a software developer, I’m used to building solutions from scratch. More importantly, I’d been looking for an excuse to try my hand at something more tangible than lines of code. This project seemed like the perfect opportunity to dip my toes into the world of woodworking.
And so began my journey into a new hobby. Armed with a healthy mix of curiosity, a vague understanding of what a saw does, and the kind of enthusiasm only a complete novice can muster, I set out to build my very own cycling desk.
Little did I know that this project would not only solve my winter cycling conundrum but also introduce me to a whole new world of creation. It would teach me valuable lessons about physical problem-solving and give me a newfound appreciation for the satisfaction of building something with my own hands.
The Planning Phase: Three Weeks of Research and Design
With my makeshift bookshelf-on-a-bike-stand setup serving as a constant reminder of what could be improved, I dove headfirst into the world of woodworking. Little did I know that this initial plunge would turn into a three-week deep dive of research and design.
Woodworking 101: A Reality Check
My journey began with a woodworking binge-watch session. I consumed dozens of videos on woodworking fundamentals, necessary tools, and basic techniques. However, reality quickly set in. Most “Woodworking 101” tutorials assumed I had access to a fully equipped workshop, complete with table saws, band saws, and other intimidating machinery. My “workshop”? A spare 10 square meter room in my house, with a lonely saw as my sole woodworking companion.
This initial discovery was quite daunting. How was I supposed to build anything without all this specialised equipment? But as I dug deeper, I realised that for my modest cycling desk project, I could manage with a more basic set of tools. This realisation was both a relief and a challenge — I’d need to be creative with my approach and possibly adapt some techniques to suit my limited toolset.
The Overwhelming World of Woodworking Techniques
As I continued my research, I found myself in a whirlwind of woodworking techniques. Joints alone came in more varieties than I wanted to care about — dovetail, mortise and tenon, pocket holes, biscuit, the list went on. Then there was sanding, with its progression of grits, and the various finishing techniques like oiling, staining, and varnishing. Each option came with its own set of pros and cons, and deciding which techniques to use felt like solving a complex puzzle.
Despite feeling overwhelmed, I reminded myself that I didn’t need to master every technique for this project. I focused on understanding the basics and identifying which methods would be most suitable for a simple, sturdy desk.
Sketching and Design: Enter Blender
With a basic understanding of woodworking under my belt, it was time to start designing. After some research on design tools, I decided to go with Blender. There was just one small problem — I had never used Blender before.
Undeterred, I found a Blender tutorial series1 by BlenderGuru on YouTube. The course walked through the process of creating a 3D donut, which might seem unrelated to desk design, but it covered all the fundamental skills I needed. I spent several evenings following along, learning about 3D modeling, manipulating objects, and creating simple designs.
Armed with my new Blender skills, I began prototyping my cycling desk. I experimented with different shapes and sizes, always keeping in mind the limitations of my tools and workspace (Google Images being an excellent companion in providing some inspiration for designs). The ability to visualise the desk in 3D was invaluable, allowing me to spot potential issues and refine my design before cutting a single piece of wood.
As the three weeks drew to a close, I had a design I was happy with, a list of tools I needed to acquire, and a much better understanding of the task ahead. The planning phase had taken longer than expected, but I felt prepared to tackle the actual building process.
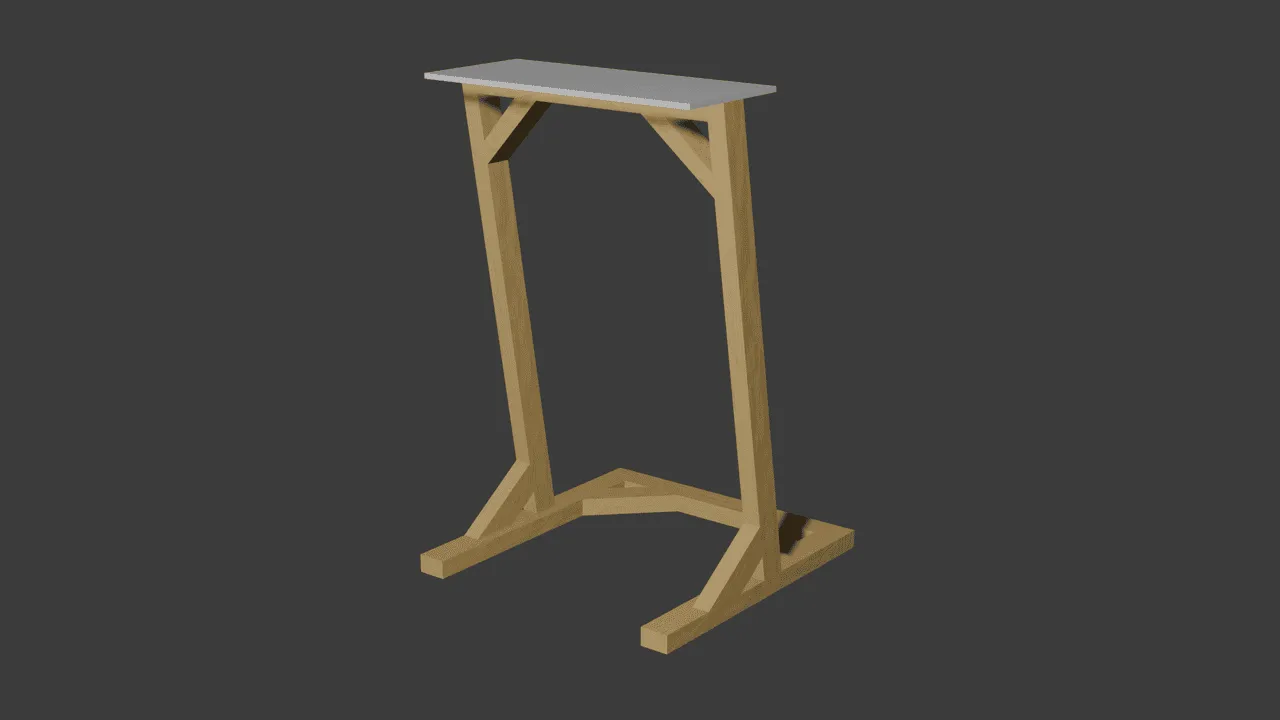
Feel free to download my design if you’re feeling inspired to build your own.
The Importance of Prototyping (In Hindsight)
Before heading further, I should mention a crucial piece of advice I received a bit too late: create a small prototype out of cardboard before ordering wood. This step ensures the structure is stable and functions as expected. However, bolstered by hours of woodworking videos on YouTube, I felt (perhaps unjustly) confident in my design and proceeded without this step.
Gearing Up: Tools of the Trade
With my design finalized and my crash course in woodworking basics complete, it was time to gather the materials and tools needed for my cycling desk project. This phase of the project was a mix of relief (realizing I didn’t need every tool under the sun) and excitement (finally getting my hands on some real woodworking equipment).
Materials: The Bones of the Project
For the materials, I chose a combination of MDF and spruce, balancing durability, cost, and ease of work. Here’s the breakdown:
- Table top: MDF shelf, measuring 710x300x12 mm
- Planed spruce 88x38 mm for the frame:
- Legs: 2 pieces at 1120 mm
- Leg bottom support: 2 pieces at 670 mm
- Leg diagonal support: 2 pieces at 240 mm
- Bottom support beam: 1 piece at 710 mm
- Bottom diagonal support: 2 pieces at 240 mm
- Top support beam: 1 piece at 635mm
Total cost: €65.95.
One of the biggest time-savers in this project was finding a supplier who could pre-cut the wood to my exact specifications. This meant that my task was focused more on assembly and finishing, rather than extensive cutting. It was a relief to know that at least the straight cuts were taken care of professionally.
Tools of the Trade: New Acquisitions
While I had some basic tools already, this project required a few specialized additions to my toolkit. Here’s what I had to purchase:
- Sandpaper Set: For my existing orbital sander, I bought a range of grits2: 80, 120, 180, 220, 300.
- Ryoba Saw: This Japanese-style saw was advertised as “the one” if you’re only getting one saw. It seemed like a versatile choice for a beginner like me.
- Clamps: I’ve got a few F-Clamps, Clutch Clamps and a Spring Hand Clamp. All of them got their fair share of use, so this was a great purchase.
- Tung Oil: I chose this for finishing, as I wanted to maintain the natural look of the wood while providing some moisture protection.
- Primer for MDF: To ensure good paint adhesion on the MDF shelf.
- Painting Roller Set: For applying the primer and paint smoothly.
- Pocket Hole Jig: This tool was essential for creating strong, hidden joints in my design. It does seem like some woodworking professionals look down on people using pocket holes for joints, as they are “weak and ugly”. I don’t really agree with that, but in any case, the table only needs to hold a tablet, and only my family, and my cat will actually ever see the table, so it being “weak and ugly” doesn’t bother me.
- Electric Planer: This was only necessary due to the angled design of my table’s top support beam. It dramatically reduced the time this task would have taken compared to using a manual hand planer.
Total cost: €159.59.
The process of selecting and acquiring these tools was a learning experience in itself. Each purchase required research to understand its purpose and how it fit into my project. I found myself balancing between buying quality tools that would last beyond this single project and not overspending on professional-grade equipment I might rarely use.
As I laid out my newly acquired tools alongside my materials, I felt a mix of excitement and trepidation. The planning phase was over, and it was time to start bringing my cycling desk to life.
The Build: One Week of Sawdust, Woodchips and Surprises
What I initially thought might be a quick weekend project turned into a week-long adventure, filled with learning experiences, unexpected challenges, and ultimately, a great sense of accomplishment.
Day 1: Preparation and Planning
The first day was all about preparation. I picked up the pre-cut wood and spent the evening meticulously labeling each piece with colored stickers, noting their purpose. I then marked the angles that needed to be cut with a pencil. Before calling it a day, I double-checked my Blender sketch to ensure I had all the necessary materials. Satisfied with my preparation, I went to sleep, excited for the work ahead.
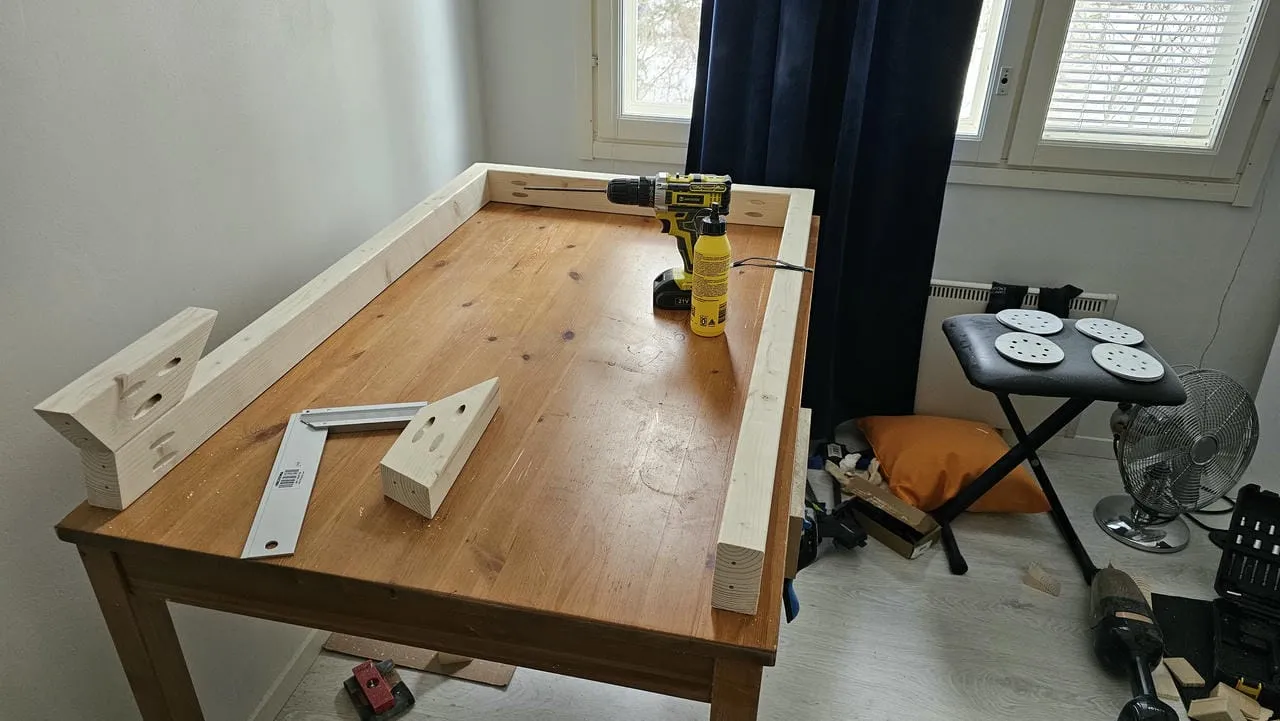
Day 2: Cutting and Priming
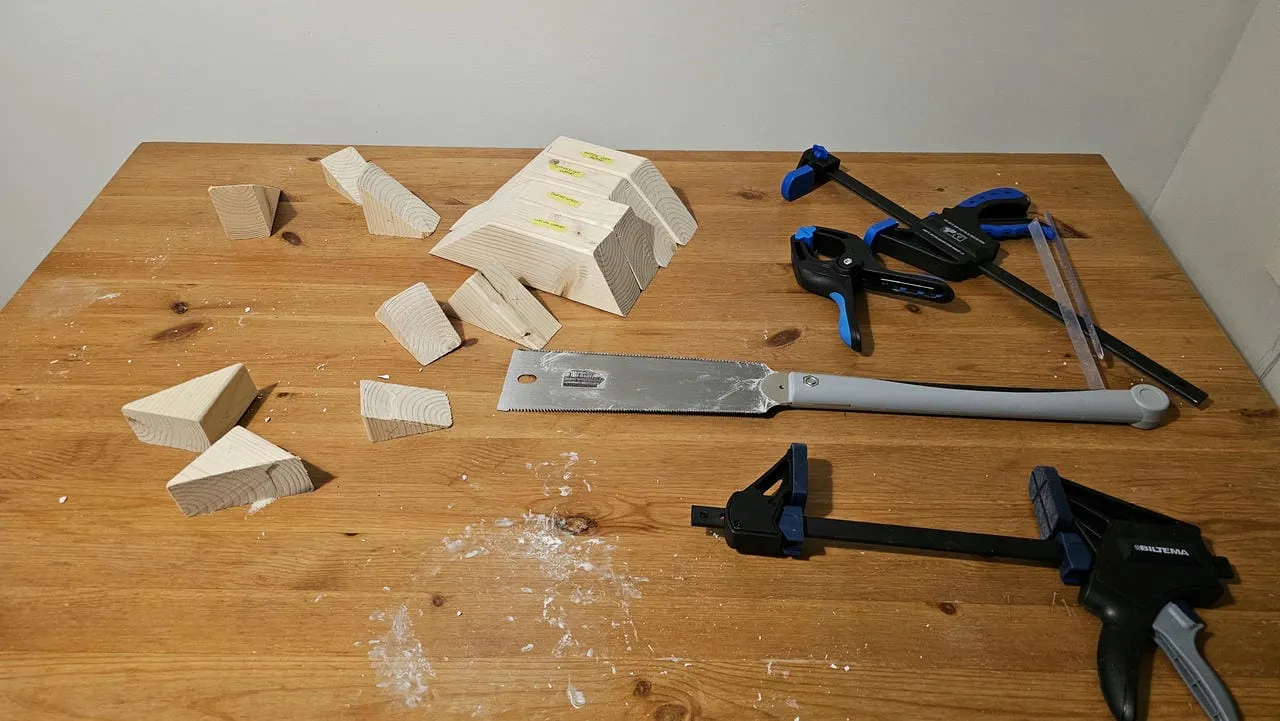
Day two saw me transforming my small room into a makeshift workshop. Armed with clamps, a table, and my new Ryoba saw, I spent hours manually sawing the marked angles. This is where I learned an important lesson: while sawing is easy, sawing straight is an art, especially with a flexible saw like the Ryoba. It took some time to adapt to the technique, but I gradually improved. Between sawing sessions, I applied two layers of primer to the tabletop, allowing it to dry overnight.
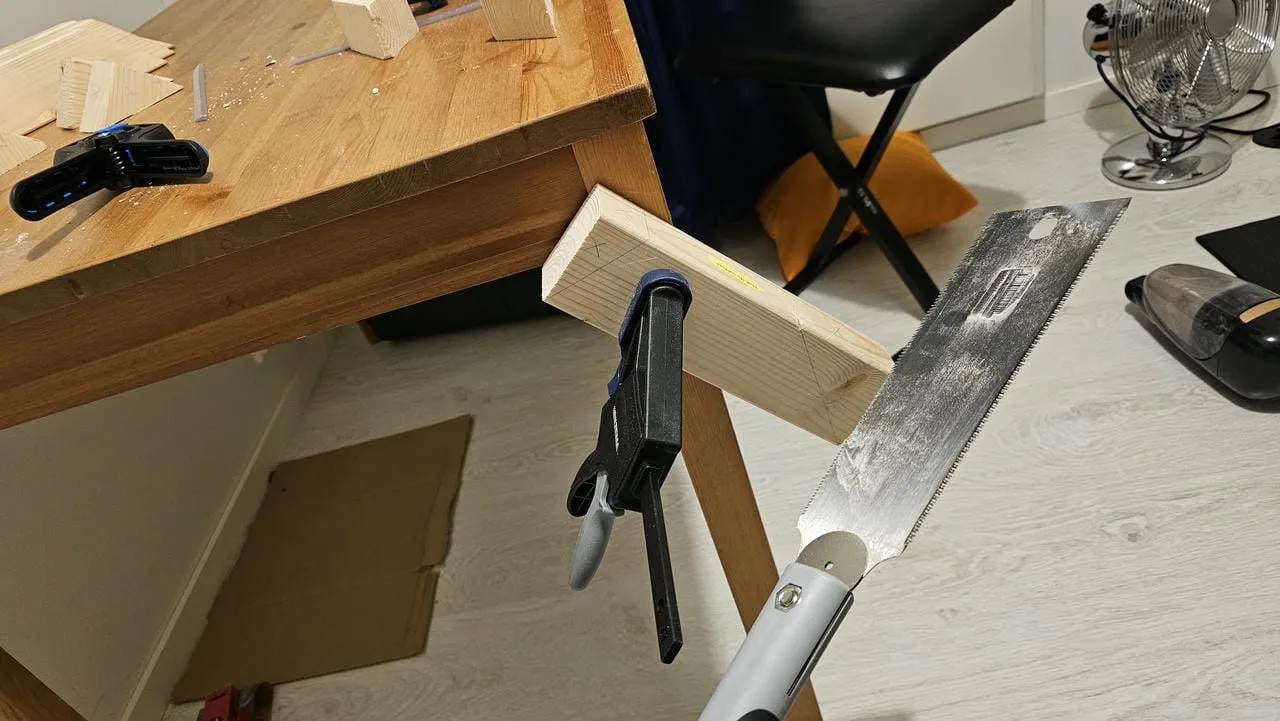
As is evident from the photo above, I’ve had no idea what I was doing. Nevertheless, I was making progress and eventually managed to cut all the angles I needed.
Day 3: Sanding Surprises
My plan for the third day was to start drilling holes, but a dry fit of the parts revealed a lack of precision in my angled cuts (so much for my newly acquired Ryoba skills). This setback led to hours of meticulous sanding, adjusting each piece to achieve a better fit. Thankfully I’ve already had my orbital sander — I shudder to think how long this would have taken by hand. Throughout this dusty process, I wore an FFP2 mask left over from the COVID era. While perhaps not the optimal choice for woodworking, it served its purpose.
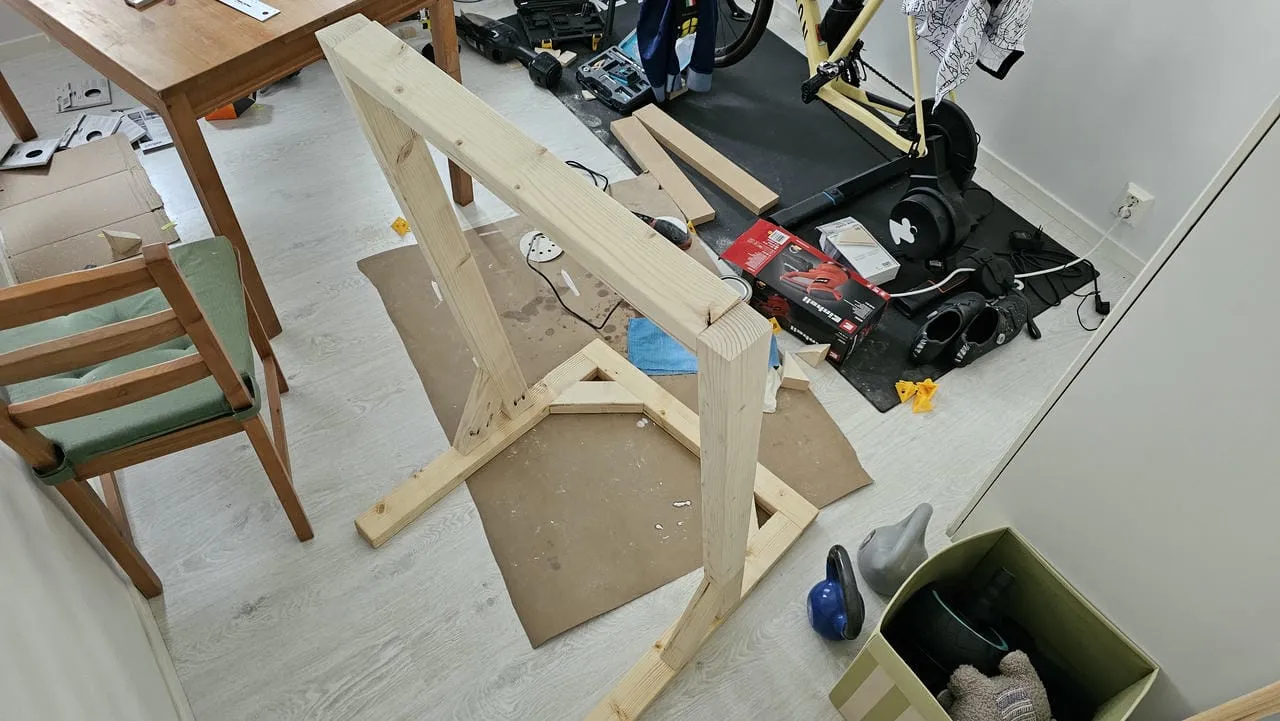
Day 4: Pocket Holes and Assembly Begins
Day four was a day of new skills and visible progress. I learned how to use the pocket hole jig, creating hidden joints in all the necessary parts. I also drilled holes for dowels in the tabletop. With these preparations complete, I began assembling the bottom support of the table. After gluing, screwing, and a period of anxious waiting, I had the base of my table ready. Before moving on, I applied oil to the bottom part, allowing both the glue and oil to dry overnight.
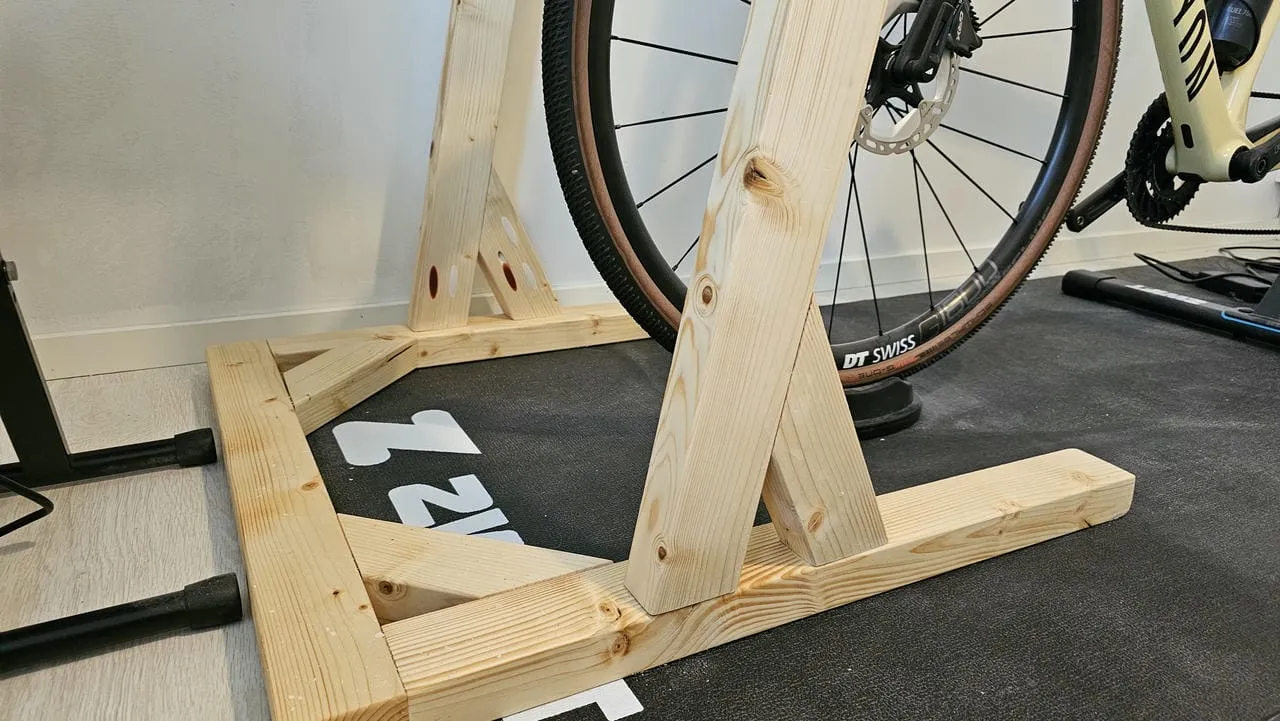
Day 5: Legs, Beams, and an Electric Planer Adventure
The fifth day saw major progress as I attached the legs to the bottom part and then the top support beam to the legs.
This is where I faced my most challenging task yet — using the electric planer to ensure the top beam was flush with the angled legs3. Despite my caution, I made a rookie mistake, damaging the top part of one leg with an overly aggressive planer pass. Some emergency sanding saved the day, though one leg now sports a smoother, rounder edge than its partner. With the structure complete, I drilled dowel holes in the top beam and tabletop, then oiled the entire structure before leaving it to dry.
Day 6: Final Assembly and Finishing Touches
On the final day, I glued the dowels in place and attached the tabletop to the structure. A final coat of oil over the entire table marked the end of the build process. As I stood back to admire my work, a wave of satisfaction washed over me. The sight of the completed table, the scent of wood and oil, the smooth feel of the finished surface — it was all worth it. I had done it. I had made a table. And it was beautiful.
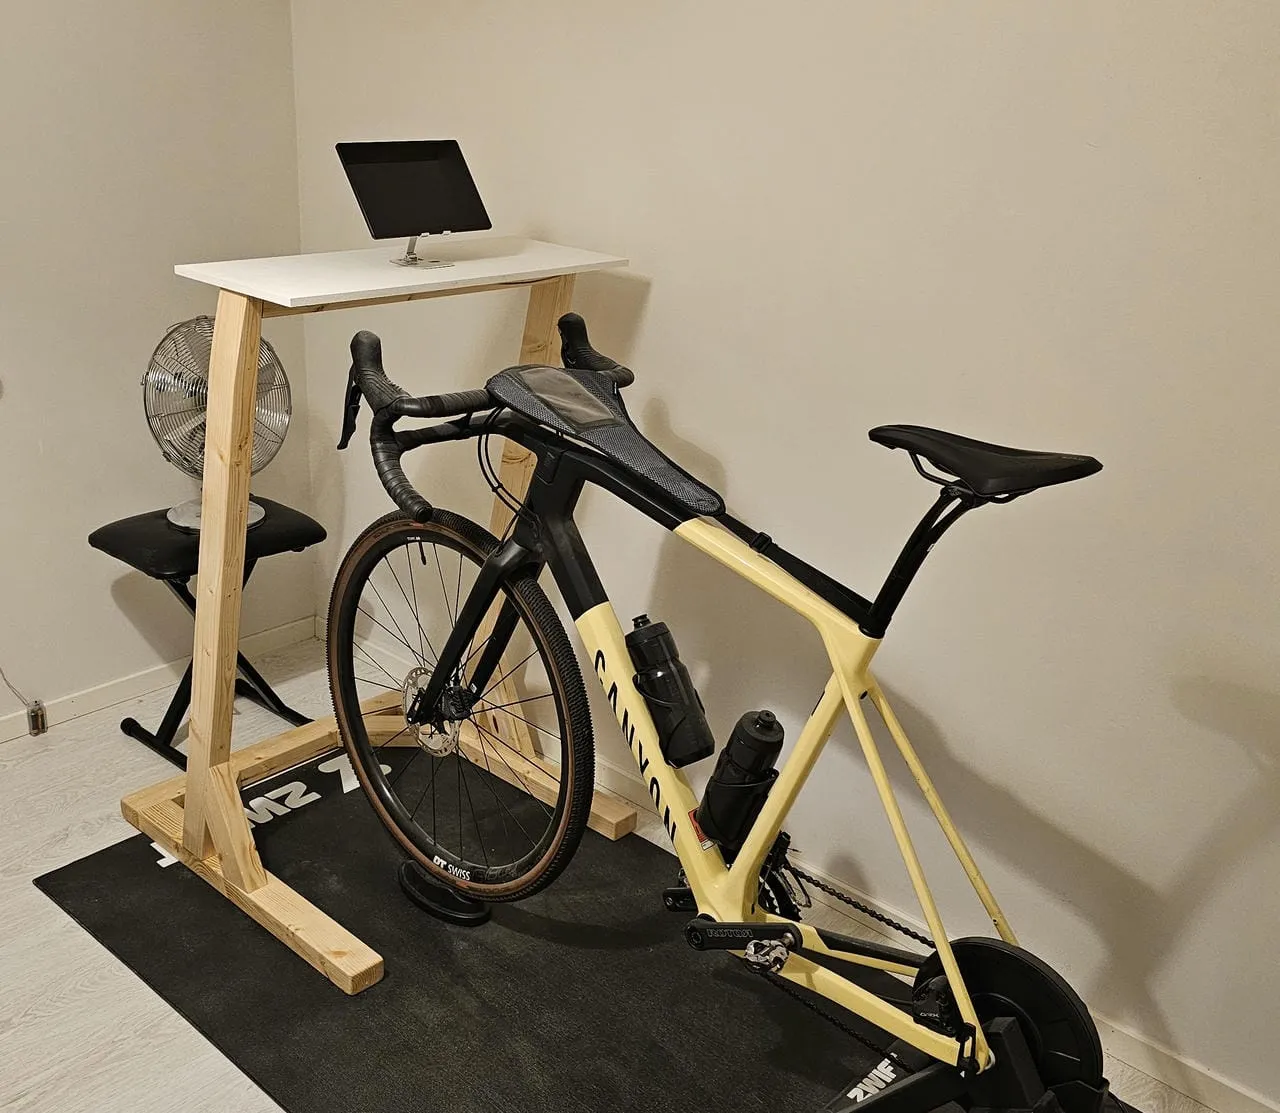
In the last photo here, the left leg tapers off at the top. This is not some intentional design choice, but the cover up of the planing failure from the day before.
Nailing It: Reflections on My Woodworking Debut
As I stood back and admired my completed cycling desk, a sense of accomplishment washed over me. The journey from a vague idea to a tangible, functional piece of furniture had been filled with challenges, learning experiences, and more than a few surprises.
Throughout this project, I discovered that woodworking is a craft that demands patience, precision, and problem-solving skills. From the initial planning stages to the final coat of oil, each step of the process taught me valuable lessons about working with my hands and bringing a design to life.
While there’s undoubtedly satisfaction in seeing code run successfully, there’s a unique joy in creating something physical. The ability to touch, feel, and use the product of your labor brings a different kind of fulfillment. The sight of the completed table, the scent of wood and oil, the smooth feel of the finished surface — it was all worth the sawdust-filled, oil-stained moments of the past week.
This project has not only solved my winter cycling dilemma but has also ignited a new passion. Already, a backlog of woodworking projects is forming. My spouse has a few requests lined up, and I have my own ideas brewing. What started as a simple solution to an indoor cycling problem has opened up a whole new world of creativity and hands-on craftsmanship.
As I clip into my bike, position my tablet on my newly crafted desk, and start pedaling, I can’t help but smile. This desk represents more than just a place to put my tablet — it’s a testament to the power of trying new things, embracing challenges, and the satisfaction that comes from creating something with your own two hands.
The journey from bytes to boards has been an adventure, and I’m excited to see where this new hobby takes me next. Who knows? Maybe next winter, I’ll be building a whole indoor cycling studio!
Footnotes
-
Blender 4.0 Beginner Donut Tutorial is an excellent resources for people with interest to learn Blender. ↩
-
Following advice from a YouTube tutorial, I made sure not to jump more than 50% in grit between steps. ↩
-
Technically, this was not really mandatory — I could have just rotated the top beam to flush it with the legs and that would have saved me some time and money, as I wouldn’t have needed the electric planer. However, then this top beam wouldn’t be flush with the legs, meaning it would pop out when looking at it from the side, which I thought just seemed like an imperfect solution. ↩